Showing posts with label Graphic 45. Show all posts

Wednesday, April 6, 2016

Wedding Album with Graphic 45 Mon Amour Collection

I have been waiting patiently to show you this beautiful album I made for my Niece and her new hubby. I finished it several weeks ago, but I could not share it until I presented it to her because she follows my work too.

Here is the cover ......
I cut the signature page down and glued the edges to the cover.
This allows for tags and pretty ephemera to be inserted.
Of course with this lovely vintage paper I had to add some lace.
I used a tutorial from Paper Phenomenon, the Traditions Genealogy Scrapbook.  This tutorial was very easy to use and makes a great "larger" mini album.  Here is the inside front cover......


This is the inside front cover with Insert #5 tucked in the pocket from the Photo Mats and Inserts #1 tutorial. I added Spellbinders heart die cuts to add the names of the Bride and Groom.

Page 1 front, inside and back.......


This album is perfect for 8x10 and 5x7 photos as well.

Lots of room to add 4x6 photos without trimming!

Back of page 1

Soooo many flaps and pockets!  Lots and lots of room for photos and memorabilia. Here's page 2......


Back of page 2

Inside page 2
This project took quite a bit of paper too.  I used most of two 12x12, two 8x8, and one 6x6 pads. The ephemera pack and Prima flowers rounded out the embellishments. Here is page 3 .....


Back of page 3 is the centre of the book with two facing pages the same.  I slipped in a couple of Photo Mats from Tutorial #1.


This is the back of page 4 and start of page 5.....


Page 5 .....


Oops, this one is upside down!

Look at all those tags for pictures!
This one is the back of page 5 .....


Page 5-6 spread .....

Under the covers of page 6 .....


Back of page 6 and the inside of the back cover .....


Whew! That is a big scrapbook!

My niece loved it and now needs a little help getter her pictures into the book.  I guess I might be persuaded to make it back to San Diego for a visit as long as the weather is nice.  Hope you enjoyed my latest scrapbook project using a Paper Phenomenon tutorial.

Have a scrappy day!
NancyD


Thursday, May 21, 2015

Update and Exploding Picnic Basket Mini Album

Hi All, I have been absent of late due to a terrible cold and lots (too much) of travelling.

I have finally completed my Exploding Box Picnic Basket and want to share it with you today.  I started this project at a local crop several weeks ago, but just couldn't finish because I spent so much time talking to my table mates and getting to know them.  It was really a fun time, but I don't think I should count on finishing any projects at crops.

Martha Stewart edge punch and rick-rack for the basket lid trim.

I used 3 sheets of 12x12 papers to make the basket-weave cover.

When Kathy Orta first created this tutorial she made it up as an Easter Basket, but since I was using the Graphic 45 Home Sweet Home Collection I thought it would work better as a picnic basket.

I did however, have a terrible time finding plastic fruit/food for the top of the basket.  It seems the 70's really are gone (yay!).  I remember as a kid that almost every parent or grandparent had a basket of plastic fruit on a table, but I could only find grapes at the dollar store!

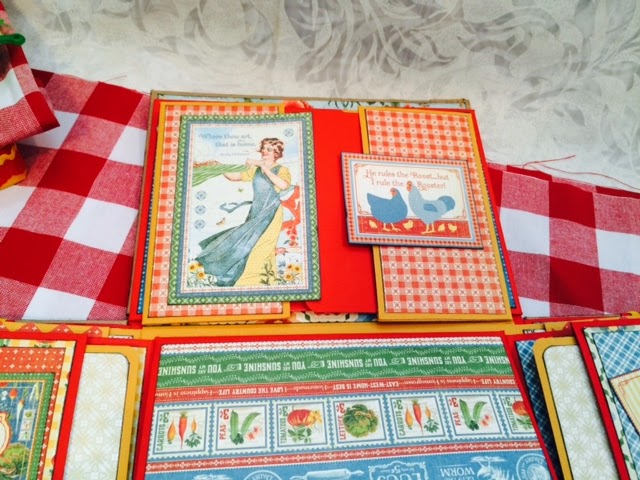
Here is an inside look.....
Remove the lid and three layers open up on the table.

Each section has a pocket for tags to hold pictures and journaling.

I used the stickers and tags in addition to 8x8 papers.
Here is a look at the 2nd layer ......


And the 3rd layer .......


This is a great project and I am sure you would love making one of your own.  Check out Kathy's tutorial and give it a try!

Project Recipe

Tutorial: Paper Phenomenon Easter Basket
Paper: Bazzill Red and Yellow, Graphic 45 Home Sweet Home colelction 8x8, a few 12x12 papers and the stickers
Embellishments: Martha Stewart Lace Edgy punch, fabric flowers from the Dollar Store, Little yellow rick-rack, and plastic grapes from the dollar store, an apple stamp from Michael's
Inks: Prima Chalk edgers from Scrapadabadoo

I am entering this great project into a couple of challenges:


Have a wonderful scrappy day!


Thursday, March 26, 2015

School Days- A Vintage Album

I am really quite excited to share this mini album with you all today.  I only learned about and fell in love with Graphic 45 early last year and by then it was too late to purchase collections that I was seeing and loving on Pinterest and YouTube.  Graphic 45 re-released this collection and naturally, I made a new mini album!


The tag is held to the cover with a brad.

Tim Holtz chain for closure.

This is my third album using the Paper Phenomenon "Max Your Mini" AKA "Witches Brew" album tutorial.  The page size is 8x8 making the album 8 1/2 x 8 1/2.  I think this is the perfect size for a smaller mini.  Big enough for 4x6 photos and small enough to maintain the cuteness factor.

Here we go with page 1.........

Inside the front cover

The back of page 1


Here is Page 2.....

Front of page 2

Back of page 2


Well, you get the idea.  I really enjoyed working with this paper collection and making a cute school oriented mini album.  Here are the fronts of the remaining pages.....


My Album Recipe:

Tutorial: Paper Phenomenon  Max Your Mini from Holiday Kit Club #2
Paper: Graphic 45 ABC Primer Re-release, Bazzill Raven Black and Red
Embellishments: Rare Earth magnets, Tim Holtz chain closure, Michael's brads, EK Success edge punches
Inks: Distress Black Soot

I do hope you give this great album tutorial a try.  No matter what paper collection you use it is going to look great!

Have a happy day!
NancyD