Monday, November 2, 2015

Zentangle on My Mind

I've had Zentangle on my mind and in my art bag this last month.  I took my Micron pens and Zentangle tiles with me on vacation to California in October and had a great time tangling and drawing whatever my pen wanted to draw.  I have also been posting on my Facebook page without making a blog post (sorry!).

https://www.facebook.com/Crafting-Passions-210565732313545/

This post is a little catchup on what I have been drawing and doing since the Tangle Island Retreat in September.

This was an exercise in Inapod tangle and shading. I have found the greatest Fb page - https://www.facebook.com/groups/shadingzentangle/.  It is all about shading and Eni Oaken provides excellent feedback and encouragement for everything that we post.


Here is another sample showing the before and after shading. The tangle is Hamadox, a combination of Rick's Paradox and Hamail.


Here is one I just finished and posted last night with Verve, Abundies, Flux, Diva Dance and Printemps.


I have also been working with a little bit of color and working on stretching my drawing a bit.  I received a little Prima journal in a mystery box and have dedicated it to the Crazy Birds and what I might do with them.  In this case, I drew a tree around them and added the Tangle Poke Root for the leaves.  It is all colored with my new Irojiten colored pencils.


Lastly, I will show you a drawing I did to emphasize color shading in a class I am teaching at North Island College this month.  The tangle is simple (can't even remember the name), but I have used it to show using three pencil shades of one color - light, medium and dark, to work out the shading.


Well, I think that is enough catchup for today.  Hopefully, my next post will be about a scrapbook that I have been working on for Christmas/Winter snow family pictures.

Have a great day!
NancyD

Saturday, October 3, 2015

Tangle Island was a success!

Hi all,  I bet you are wondering where I have been again.  My last post told you about how I was planning for the Zentangle conference in Parksville and was it ever a resounding success.  We had participants from all over who really enjoyed our classes and most of all the goodies and door prizes we handed out.

Big group photo on the last day.

The classes where a hit for sure.  On our private facebook page we are seeing lots of finished projects (very difficult to finish everything during class time) that are so beautiful it takes my breath away.  There are so many talented people out there who have found an outlet for their creative side through Zentangle.

This is one of my pieces that I created after the retreat was over with techniques from Barb Round's class.....


Many of the students have been asking if the Tangle Island Team will do another retreat next year and it is a resounding YES!  Some of us may take on lesser roles but we all enjoyed teaching and sharing our individual specialities.

Stay tuned for information about next years' Tangle Island Retreat.
NancyD


Monday, September 14, 2015

Good Monday Morning!

If you are a follower of mine you are probably wondering what has happened to my regular posting. The answer is, I have been very busy planning and preparing for the Tangle Island Retreat at the Parksville Beach Club Resort scheduled for September 18, 19 and 20.

Yes, this is a Zentangle retreat where 6 island Certified Zentangle Teachers will be leading classes in fabulous techniques and Zentangle fun. We will be learning new tangles, shading strokes, mixed media, watercolor, card making ideas and much more. I think there might be one or two spots left, so if you are interested please visit tangleisland.blogspot.com and register today.

Here are a few pics of our planning and preparation, and my practice drawing:

This is the Tangle Island Team: Nancy, Barb, Linda, Donna, Jerryann and Marie.
A little practice with the document camera

Here is a picture of the beach side of the Beach Club Resort.....


Can you guess what I might be doing with this?


Here is another drawing I did for practice


And here is one more....


We are going to have such fun visiting and learning from each other.  We have a wonderful group of folks registered for the first every Tangle Island Retreat.  Interested Tanglers are coming from the local area, Vancouver area, Calgary, Ontario, Washington, California, Nevada, Kansas, Texas, and Tennessee. Amazing!

After the retreat my hubby and I are skipping town and visiting family in California for two weeks culminating with celebrating the 120th anniversary of Yosemite becoming a national park. We actually have a camping reservation on the valley floor!  Yosemite is one of my favorite places to visit and we have many happy memories hiking and backpacking around the area.

Well, I should be posting pictures of the retreat on the weekend and then stay tuned for my trip pics!

Have a great day!
NancyD


Sunday, August 9, 2015

Having Fun making a Steampunk Album!

Hi all!  I have been having fun creating a mini album with a Steampunk theme.  This style has definitely caught me up into the Steampunk craze of 1890's mechanical.  Gears and a little rust go a long way!

I used the Classic Handbag tutorial from Paper Phenomenon without the handbag closure of course.  I also added 1 inch to the width of the base pages so that I could get more 4x6 photos into the album.

Here is the cover with all its wonderful cogs and gears.


I used a lot of goodies on the cover alone....

  • Creative clocks and corners from Butterbee Scraps   
  • Gear Assembly die cut from Memory Box
  • Cuttlebug embossing folder on the tag
  • Metal key and brads from Michael's
  • Paper line is Kaiser Kraft Betsie's Couture
  • Everything is inked with Distress Brushed Corduroy
  • I inked the gears with Inca Gold Turquoise and Copper
  • The pin is from Prima
The clock at the top rotates!


Inside cover pocket with goodies!

This is the first page with all its flaps and pockets.......

I used Sizzix Trellis die on the pocket after rubbing with Inka Gold Turquoise and Copper.  The tag is embossed with a Darcie embossing folder. The tag in the top pocket is cut with the Steampunk "on the edge" dies from Tim Holtz (also added Glossy Accents) and finally the large tag in the pocket is cut with the EK Success scroll edge punch.

First side of first page.
Open the page flap to reveal more pockets
Back of first page. Large pocket contains a folder from Marion Smith.
Paper clips are from Prima.


Page mats are embossed with cuttlebug folder and then rubbed with Inka Gold.
Here is page two ....

This page has a flap that folds down and one that opens the page.

More embossing and dies cuts
Inside the page

Back of page and start of #3 with its waterfall.
More of Page 3 - this is where I introduce the Kaiser Kraft Antique Bazaar collection.


And now we are repeating page styles .....

The left page is collaged with several pieces from the ephemera packs.


There is a Butterbee Scraps filigree on the top waterfall flap.


This is a great tutorial and very easy to follow.  You can get it here at Paper Phenomenon.

I used three paper collections: Marion Smith Nirvana, Kaiser Kraft Betsy's Couture and Antique Bazaar, as well as a few pages from Recollections Espresso.

Thanks for stopping by and checking out my new album creation.

Have a Happy Scrappy Day!
NancyD


Monday, July 27, 2015

Mixed Media Foray

Today I would like to share my first every foray into mixed media.  A friend of mine (Linda) was over and she showed me a few ideas on how to get started. It was loads of fun and very easy to do.

Linda brought little packets of papers, fibres and trinkets. Each packet was slightly different and of course each artist will interpret and use the items differently according to their style.  Our tools were glue stick, liquid glue, staples, and a micron pen (to Zentangle).  I know there is a lot more that can be done with Gesso, paints and stencils, but this is just a beginning.


I picked out papers that "spoke" to me and cut or tore sections to add to my 5x7 chipboard piece.  I arranged them in whatever way made sense to me.  I like dimension so I added a curled up piece of netting and sparkling star on one side and a folded napkin on the other side.  Then we added Tangles to spice it up!

When we are finished we will coat everything with Mod Podge (I haven't done that part yet). In the end, I kinda think my piece tells a story. It's a little corny, but here goes......

We are all like a little fish who is on a life journey.
           
               Sometimes she will face obstacles, 
               but if she pushes through them she will be the star of own story. 

               Along the journey she might be delayed by her own struggles (nets),
               but she was given the building materials to make our own life story.

               If she perseveres she will have the joy of blossoming into a unique and special person.

I'll end on that corn fed note with .... Have a scrapping great day!
NancyD

Friday, July 10, 2015

Banner Board Mini Album

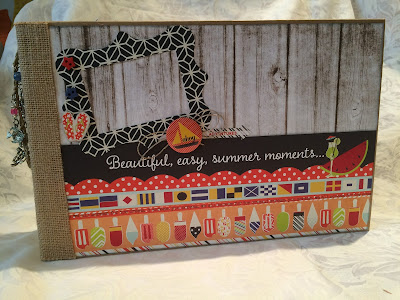
I recently purchased the new We R Memory Keepers Banner Punch Board from Scrapadabadoo in Washington State. I have made several banners of course, but I was recently challenged to come up with my own scrapbook album design and I wondered if anyone had used this board to make a mini.  I searched Pinterest and Youtube and the answer is no, so I think this makes me the first designer to create a mini album from the Banner Board.


I made a 5 page album that is 7 1/2 x 11 inches.  There are three pages in the Flag banner style and 2 in the Pennant style.


I used Kathy Orta's hidden hinge binding system to attach the pages to the album cover.  The paper collection is Nautical from Fancy Pants Designs.  I pick up a mega set from Steals.com with all the papers, chipboard, stickers, buttons, photo frames and pocket cards.

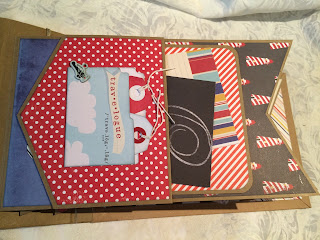
Here is the inside front cover with hidden pocket and folded tag.


Next comes the first page......

I made a Crest banner, folded it and added to the base page to form the pocket.


On the back of the page I added a waterfall for lots of pictures.
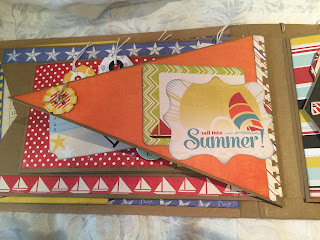
Page 2 is a Flag page ....

Pocket card is secured as a flap to hold the tag.

Inside the flag page

Back of the Flag page
Page 3 ....


Under the flap

Tags from the pocket

On the back is Kathy's stacked pockets.
Page 4 is another Flag page ....

Place a photo in the frame


Page 4 is a Pennant page ...


and then finally the back cover pocket and flap.....


This was a super quick and fun album to make.  I am working on a tutorial that I will give away for FREE to anyone who likes my Crafting Passions Facebook page (don't forget to private pm me your email address). The Free tutorial will be sent out on Sunday, July 19th.

Hope you enjoyed the very first Banner Punch Board mini album!

Happy Scrapping!
NancyD