Showing posts with label Zentangle. Show all posts

Sunday, January 17, 2016

Tangle Island 2016 Workshops

I am happy to announce that there will be two workshops this year at Tangle Island.  They will be held at the MacMillan Arts Centre in Parksville, BC on June 4-5 and Oct 1-2, 2016.

Check out the Tangle Island website for registration details.


Jerryann Haggart, CZT 12 and myself, Nancy Dawes, CZT 13, are teaching beautiful background techniques with Twinkling H2Os and Tombow Dual Brush Pens, 10 special tangle patterns while we make a hand-sewn watercolor booklet.  You will learn to draw gorgeous butterflies and dragonflies too!

Check out the information on our Tangle Island website and register before it is too late.  Space is limited to 25 tanglers.

Happy Tangling!

Monday, November 2, 2015

Zentangle on My Mind

I've had Zentangle on my mind and in my art bag this last month.  I took my Micron pens and Zentangle tiles with me on vacation to California in October and had a great time tangling and drawing whatever my pen wanted to draw.  I have also been posting on my Facebook page without making a blog post (sorry!).

https://www.facebook.com/Crafting-Passions-210565732313545/

This post is a little catchup on what I have been drawing and doing since the Tangle Island Retreat in September.

This was an exercise in Inapod tangle and shading. I have found the greatest Fb page - https://www.facebook.com/groups/shadingzentangle/.  It is all about shading and Eni Oaken provides excellent feedback and encouragement for everything that we post.


Here is another sample showing the before and after shading. The tangle is Hamadox, a combination of Rick's Paradox and Hamail.


Here is one I just finished and posted last night with Verve, Abundies, Flux, Diva Dance and Printemps.


I have also been working with a little bit of color and working on stretching my drawing a bit.  I received a little Prima journal in a mystery box and have dedicated it to the Crazy Birds and what I might do with them.  In this case, I drew a tree around them and added the Tangle Poke Root for the leaves.  It is all colored with my new Irojiten colored pencils.


Lastly, I will show you a drawing I did to emphasize color shading in a class I am teaching at North Island College this month.  The tangle is simple (can't even remember the name), but I have used it to show using three pencil shades of one color - light, medium and dark, to work out the shading.


Well, I think that is enough catchup for today.  Hopefully, my next post will be about a scrapbook that I have been working on for Christmas/Winter snow family pictures.

Have a great day!
NancyD

Saturday, October 3, 2015

Tangle Island was a success!

Hi all,  I bet you are wondering where I have been again.  My last post told you about how I was planning for the Zentangle conference in Parksville and was it ever a resounding success.  We had participants from all over who really enjoyed our classes and most of all the goodies and door prizes we handed out.

Big group photo on the last day.

The classes where a hit for sure.  On our private facebook page we are seeing lots of finished projects (very difficult to finish everything during class time) that are so beautiful it takes my breath away.  There are so many talented people out there who have found an outlet for their creative side through Zentangle.

This is one of my pieces that I created after the retreat was over with techniques from Barb Round's class.....


Many of the students have been asking if the Tangle Island Team will do another retreat next year and it is a resounding YES!  Some of us may take on lesser roles but we all enjoyed teaching and sharing our individual specialities.

Stay tuned for information about next years' Tangle Island Retreat.
NancyD


Monday, September 14, 2015

Good Monday Morning!

If you are a follower of mine you are probably wondering what has happened to my regular posting. The answer is, I have been very busy planning and preparing for the Tangle Island Retreat at the Parksville Beach Club Resort scheduled for September 18, 19 and 20.

Yes, this is a Zentangle retreat where 6 island Certified Zentangle Teachers will be leading classes in fabulous techniques and Zentangle fun. We will be learning new tangles, shading strokes, mixed media, watercolor, card making ideas and much more. I think there might be one or two spots left, so if you are interested please visit tangleisland.blogspot.com and register today.

Here are a few pics of our planning and preparation, and my practice drawing:

This is the Tangle Island Team: Nancy, Barb, Linda, Donna, Jerryann and Marie.
A little practice with the document camera

Here is a picture of the beach side of the Beach Club Resort.....


Can you guess what I might be doing with this?


Here is another drawing I did for practice


And here is one more....


We are going to have such fun visiting and learning from each other.  We have a wonderful group of folks registered for the first every Tangle Island Retreat.  Interested Tanglers are coming from the local area, Vancouver area, Calgary, Ontario, Washington, California, Nevada, Kansas, Texas, and Tennessee. Amazing!

After the retreat my hubby and I are skipping town and visiting family in California for two weeks culminating with celebrating the 120th anniversary of Yosemite becoming a national park. We actually have a camping reservation on the valley floor!  Yosemite is one of my favorite places to visit and we have many happy memories hiking and backpacking around the area.

Well, I should be posting pictures of the retreat on the weekend and then stay tuned for my trip pics!

Have a great day!
NancyD


Monday, July 27, 2015

Mixed Media Foray

Today I would like to share my first every foray into mixed media.  A friend of mine (Linda) was over and she showed me a few ideas on how to get started. It was loads of fun and very easy to do.

Linda brought little packets of papers, fibres and trinkets. Each packet was slightly different and of course each artist will interpret and use the items differently according to their style.  Our tools were glue stick, liquid glue, staples, and a micron pen (to Zentangle).  I know there is a lot more that can be done with Gesso, paints and stencils, but this is just a beginning.


I picked out papers that "spoke" to me and cut or tore sections to add to my 5x7 chipboard piece.  I arranged them in whatever way made sense to me.  I like dimension so I added a curled up piece of netting and sparkling star on one side and a folded napkin on the other side.  Then we added Tangles to spice it up!

When we are finished we will coat everything with Mod Podge (I haven't done that part yet). In the end, I kinda think my piece tells a story. It's a little corny, but here goes......

We are all like a little fish who is on a life journey.
           
               Sometimes she will face obstacles, 
               but if she pushes through them she will be the star of own story. 

               Along the journey she might be delayed by her own struggles (nets),
               but she was given the building materials to make our own life story.

               If she perseveres she will have the joy of blossoming into a unique and special person.

I'll end on that corn fed note with .... Have a scrapping great day!
NancyD

Thursday, July 9, 2015

Zentangle Pop Up Box

As an avid card maker and scrapbooker I like to make all kinds of interactive projects with lots of flips, flaps and folds.  As a Zentangle artist I like to draw new patterns and add to my growing list of favorites.  I am seeing the most amazing results when I combine my love of paper arts with Zentangle drawing.

Today I would like to share with you a pop-up card decorated with Prima papers and sea oriented Tangle patterns.  In the Zentangle world this is referred to as a ZIA, Zentangle Inspired Art.


Ordinarily, I would fill the center with lots of images sticking out, and I will, I just though you would like to see the basic design first.


The top flaps have two layers of Prima Seashore papers and then a Bijou tile Tangled with different designs.  Tangles included are Mooka, Roxi, Kelp, Indy-rella, and Squid.


I Tangled an underwater scene around the base of the box before putting it together. Tangles included are those named above as well as Phicops, Printempts, Moon Pie, Tipple, Sanibelle.  I lightly colored the scene with chalk pencils.


The beauty of a Pop Up Box card is that it folds flat and can be sent to someone through the mail in a regular envelope.


I wrote a tutorial years ago on how to construct the Pop Up Box.  You can view the tutorial here.

A Zentangle Pop Up Box is a great way to share your love of Tangling and give a unique card to your favorite person.

I'll be entering this card into a few challenges:


Happy Tangling!
NancyD


Saturday, April 25, 2015

Tangle U 2015 Musings

Last week I posted that I was on my way to Tangle U 2015.  This is the CZT (Certified Zentangle Teacher) continuing education put on my Elaine Huffman.  114 CZT came together for more learning, fun, Santa Fe sights and food (of course!). Three of us from Vancouver Island were present: Barb Round, Marie Browning and Me!


My hubby came too and we met lots of new people and made a new friendship with Char and Mike from California, and Sheila and John from Ontario.  The guys drove around New Mexico while the ladies enjoyed fabulous classes. On the way to dinner one night I found these interesting ladies pants. The design is a lot like the Tangle pattern Printemps.


Friday morning we woke to SNOW! I couldn't believe that I had to travel over 1000 miles just to get snow.  There hasn't been any in my town of Courtenay this year and we usually get a least two little snows! It didn't last long, but it was a surprise!


All the classes and sharing opportunities were fabulous!  I learned so much that I am trying to debrief through all the materials I brought home so that I don't forget too much.  My favourite class was with Sharla Hicks from Southern California. The most inspiring quote of the day for me was her comment that "more is more".
She encouraged us to add elements to the foreground and background of our piece.  This is from my notebook and represents some of what she taught.


Since I have been home I made another attempt at the techniques and I really like what is happening to my drawing.


Well, all good things have to come to an end and on Sunday we said our goodbye's.  We left amid hugs and email exchanges and hopes of seeing each other again at the next Tangle U.

On the way to the airport Dave and I decided to drive the old road called the Turquoise Trail instead of the main highway from Santa Fe to Albuquerque.  We stopped at a vary small town to see what there was and snapped this pic of Dave in front of an old engine.


We couldn't help stopping at the next little town of Madrid.  Turns out this is the town where Wild Hogs was filmed!  Apparently Maggie's Diner has never been a dinner but a little town store.


I'll leave you with a picture of all the Talavera swamp tiles that we exchanged between us all.  And if you are a CZT, I look forward to seeing you at the next Tangle U in Maine!


NancyD

Monday, April 13, 2015

Zentangle Butterfly from Stencil

I've been working in my sketchbook lately trying different Dream Weaver stencils that I purchased at Tangle U 2014.  This one is a beautiful butterfly and suitable for this weeks Diva Challenge. We are to trace an object to use as our string.


Tangles used are Ennes, Brayd, Floorz, and Shattuk. You can find step-outs for these tangle on TanglePatterns.com.

I'll be heading out to Santa Fe, New Mexico on Thursday just in time for Tangle U 2015.  I hope to meet many more CZTs and find more enticing art goodies like these Dream Weave stencils.

Happy Tangling!
NancyD

Friday, March 6, 2015

New Tangle - Laughmin

Every once in a while inspiration hits you smack between the eyes and I had one of those experiences today.

Elaine Huffman, the inspiration behind Tangle U (a continuing education retreat for Zentangle Teachers) posted on Facebook a picture of a Minion with a definition for Snaughling.  During the ensuing dialogue Jane MacKugler suggested that we might get a new Tangle out of snaughling.

Well, that was a challenge that I could not pass up!  This is what I created:


If you are a Zentangle fan you will recognize this chart as a "step out".  It shows the steps to draw the Tangle and there are just 4 steps to Laughmin.  The name is a take on laughing Minions.  Every time I see a picture of the Minions I have to smile and my Tangle kind of looks like a smile.


Give it a try and let me see what you create!

NancyD


Saturday, December 20, 2014

Zentangle Inspired Art with Gelato Circles

It is time to mix things up a bit and post some of the Zentangle Inspired Art I have been creating.

I saw a post on Facebook where someone had drawn circles all over their page.  I am not sure what they had planned because I really didn't read the rest of the post.  As soon as I saw the picture though I knew what I wanted to do with the same idea.


I used a set of metalic gelatos (I know you are probably thinking ice cream at this point) to make a water color solution. All you need to do is chunk off a little piece of the gelato paste and add water.
It takes a bit of effort to mix it up into a water color solution.  You really have to swish it around with the water, adding more water drops as needed to get just the right amount of fluid.


When each color solution was ready, I dipped different sized cups and lids from the kitchen into the solution and then onto my water color paper.  The metalic gelatos make a very nice shiny circle.  I added a few to a page and more to other pages.  Sometimes when I lifted the cup it splattered the gelato color which made a another cool effect.


Once the paper was completely dry I started adding Tangles inside the circles.  On one page I choose to change the Tangle in each and every circle section (above).  On the other I decided to respect the circle and keep the same Tangle for the whole circle regardless of how many times it was split.

Work in progress

Have a go at this super simple water color technique and you will be surprised what an artist you really are.

Have Fun!

NancyD


Sunday, October 19, 2014

Zentangle Basics Classes

I have had two really great Zentangle classes recently and have neglected to post the pictures.  This first photo is from the Elder College class that runs 4 weeks.  We are learning the basics of the Zentangle drawing method and then sprinkling in work with Black and Tan tiles.


This is my favorite part of the class, when everyone looks at all the tiles together and gasps.  They realize that they all heard the same teaching but every tile has its own unique artistry.  Love it!!!

My other class was at Scrapbook Central in Courtenay.  I had 5 wonderful students who kept exclaiming, "how cool."  What a wonderful feeling to impart this fabulous mindful drawing method to my students.


Everyone did such a wonderful job!

Happy Tangling!
NancyD

Wednesday, August 27, 2014

Introducing My New ZenFolio!!

This is a project that I have been working on for a couple of weeks and I am so excited to finally share it with you all!!

I am an avid cardmaker and scrapbooker and now a Zentangle artist.  I am consistently working on combining my passion for paper construction with beautiful materials to showcase Zentangle.  This project combines "mini-scrapbook" style construction with a little bit of designer paper and lots of Tangling.

I made a ZenFolio for myself to take my Zentangle supplies with me on my weekly trips up and down Vancouver Island.  I can also use this great ZenFolio to show my Tangling to prospective students and venues for classes.  Tada!!!


I know, it doesn't look like much yet, but I am planning to Tangle all over the cover with Sakura white gel pen and Metalic gel pens. Wait until you see what's inside........


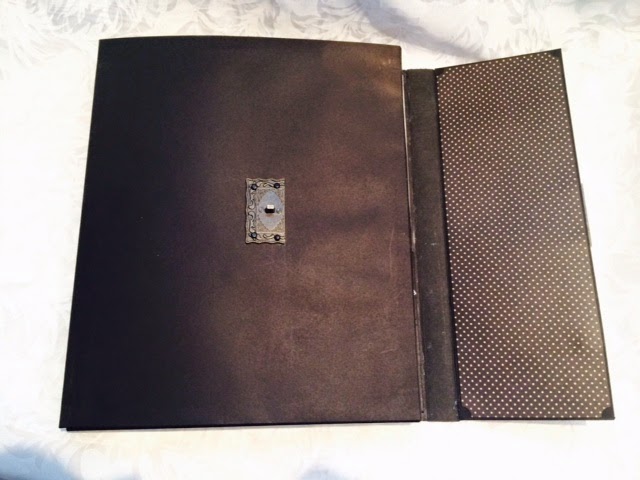
Oh wait, I can't show you the inside until we talk about the construction and the closure.  I found this amazing antique lock closure at a scrapbook store in a little box full of bits of this and that.  I wish I could tell you who makes it but it did not come in a bag with an identifying label.  If anyone knows please leave a comment and I will gladly give credit.


While I did come up with the general idea of my ZenFolio I also had lots of help from a very special designer - Kathy Orta from Paper Phenomenon.  I used her Contessa and Foto Folios as a guide in determining what sections I wanted in my personal folio.  I also used Kraft-Tex as the very sturdy spine between each section of the folio.


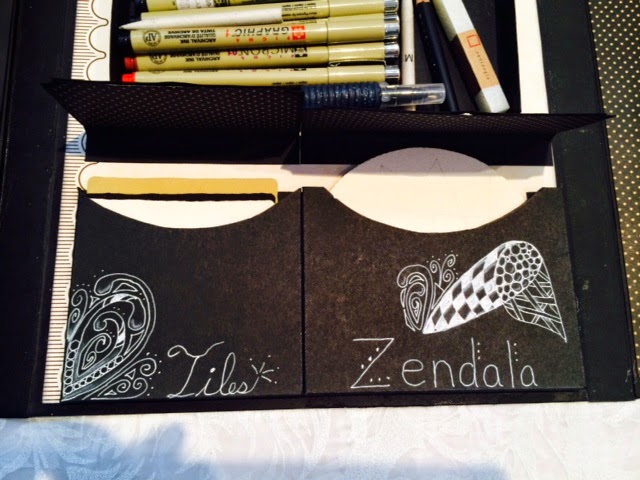
When the ZenFolio is first opened I have a sturdy (chipboard reinforced) clipboard to provide a solid surface Tangling.  On the right I have a box with a magnet closure to hold my pens.  Below the pens are little boxes, just the right size to hold regular Tiles and Zendalas.


The one designer paper you can see throughout the project is from Graphic 45 Mother Goose collection.  I wanted to add a few bits of dp along with my Tangling to help draw the two mediums together.

But wait, there is more.....
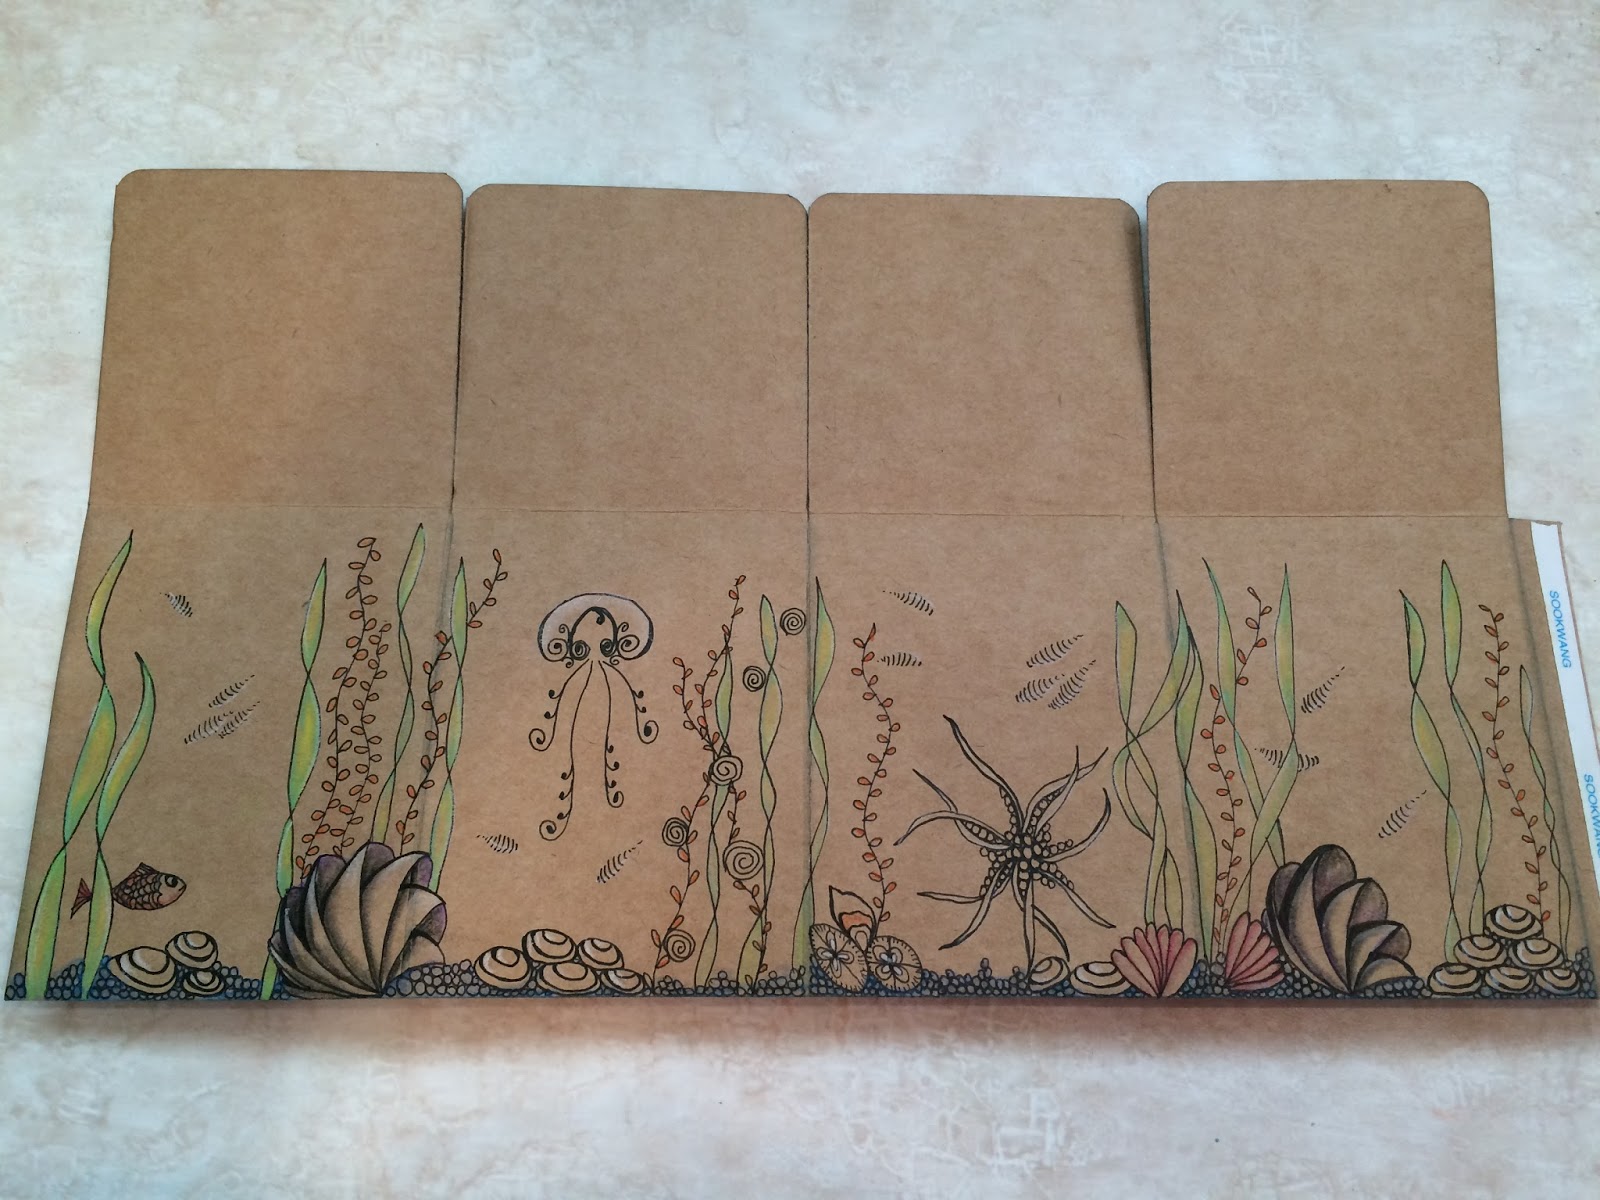
Open the folio to the next step and reveal a section for showing off completed Tiles.  There are four flaps that run the length of the page and hold up to 6 tiles each.


The flaps fold back and forth to show off both sides of what the flap is holding.


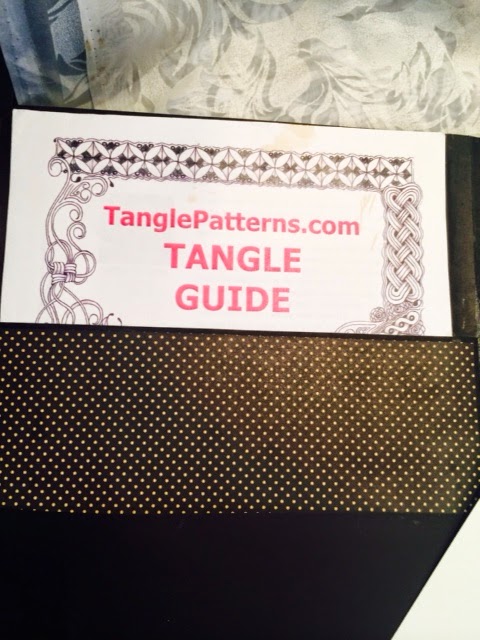
Finally, the last section has two large pockets to hold larger items like my copy of TanglePatters.com and extra watercolor paper for ZIA (Zentangle Inspired Art) work.


Underneath it all is a hidden surprise!  This is a piece I did for my original Zentangle blog - Just Tangling Along which I have now folded into Crafting Passions.


Well, I hope you have enjoyed my special project for today.  I'll post pictures of the front and back cover of the ZenFolio when I finish all the Tangling.

Have a great day!!!
NancyD