Wednesday, February 26, 2014

Sealed With A Kiss!

In my family, being outdoors is the norm.  We love hiking, swimming and camping and in our area those opportunities abound. 

Another activity that we have shared is 4-bying. One of my sons has a jeep that he takes out and challenges himself to get over the most rediculously high rocks.  The crazier the angle the better.  This wonderful Monster Truck image from Digital Delights makes me think of him.


I colored the Monster Truck camouflage colors with my Copics and then cut it out.  It is glued in place with a little Ranger Glossy Accents. This is an easel card that I stopped in place with the Licence Plate Love Sentiment Set. The die cut tee is from Memory Lane.  I punched out different sized hearts (also camo) to make the leaves.


Card Recipe
Paper:  Bazzill, Cosmo Cricket lined paper
Markers/Ink: Copics, 
Embellishments: Memory Lane tree die, Ranger Glossy Accents (for the window), Darcie gems, EK Success heart punches, Jillibean cut-apart


 Challenges for this card:
Be sure and take a look at what the wonderful Design Team has come up with for your inspiration. And then hop over to the Delightful Challenges site and check out this week's challenge.

Have a Great Day!


NancyD

Wednesday, February 19, 2014

Butterfly Kisses Make Good Kisses

As soon as I saw Butterfly Vicky I knew that I wanted to make her into a card with the new Graphic 45 Courture papers. Butterfly Vicky has an exotic look and I thought she would look good with the peacock feather colors.


I added Platinum Stickles around the edge of the Butterfly wings and on Vicky's costume.

Card Recipe
Paper:  Bazzill, Graphic 45 Couture
Markers/Ink: Copics, Distress Tea Dye
Embellishments: Spellbinders die, Sizzix butterflies and Label punch, craft lace and ribbon, Stickles, Prima pearls


 Challenges for this card:
Be sure and take a look at what the wonderful Design Team has come up with for your inspiration. And then hop over to the Delightful Challenges site and check out this week's challenge.

Have a Great Day!


NancyD

Sunday, February 16, 2014

Little Darlings Scrapbooks for Baby

Hi everyone,

I have new scrapbooks to show you!  This post has a lot of pictures so grab your favorite drink, sit back and relax while you scroll through.

There are so many baby's coming in my office and my family that I thought I had better get to work on a few baby albums.  Before Christmas I fell in love with the methods Kathy Orta uses and ended up buying two of her Baby Block kits on sale. The kits include the wonderful Graphic 45 Little Darlings paper collections (2 12x12 paper pads each giving me 4 pads of paper), pink or blue card stock and ribbon, a very cute bear and fabulous trinkets for charms.

Leafing through the paper collection I noticed that there are a number of pink, blue and green focused papers.  So, I decided to separate out the colors a bit to make three albums using each of the color schemes.

For the green one I used the Baby Block tutorial and mostly followed it.  I did not make all the little scrapbooks to fill the blocks, but instead made the drawer larger so that I could fit a 8 1/2 x 5 1/2 album.  For the album I used the Build a Page tutorial., but I turned it on its side.  That was a bit tricky and fortunately it worked out as you will see in the photos below.


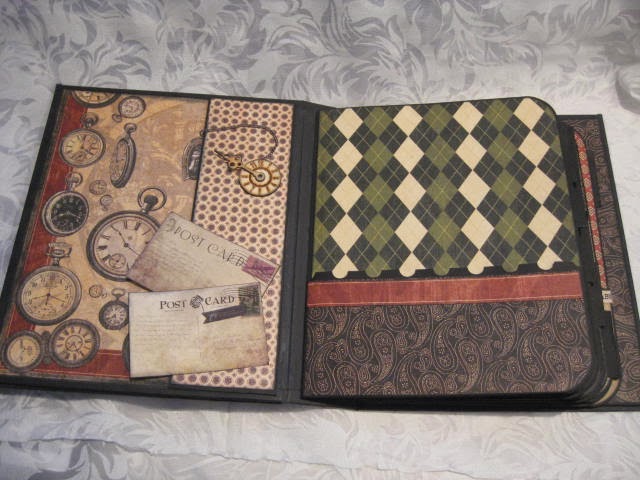
I made the blue album 7 1/2 x 5 1/2 and used the Build a Page tutorial with the normal orientation.  Kathy created that tutorial with a specific binding and then updated the tutorial to use her Hidden Hinge system.  I made it with the Hidden Hinge and ended up with pockets on the top and on the side.  This really provides lots of space for pictures.  I also created a folding box to contain the album.


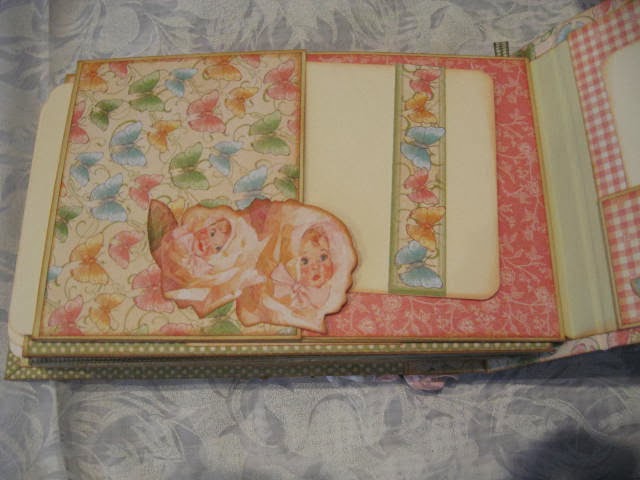
For the pink album I made my own tutorial which I will post later. I used the We R Memory Keepers Envelop Punch Board to make my pages as envelopes and used Kathy's binding and hinge techniques. I also used the board to make the tags for each page.


OK, so here are the pictures for each of the albums starting with the pink.  The front of each page is blank so that it fits a full-size photo and the back of the page has a pocket for more tags.


The blue album also has a folding box that I saw on the web and then adapted to my album using Kathy's techniques.

I made the front of the box plain with a frame for a picture of the baby.
Open the box to reveal the album.


And Finally the green album:

The drawer is bigger to fit the 8 1/2 x 5 1/2


Inside front cover pocket

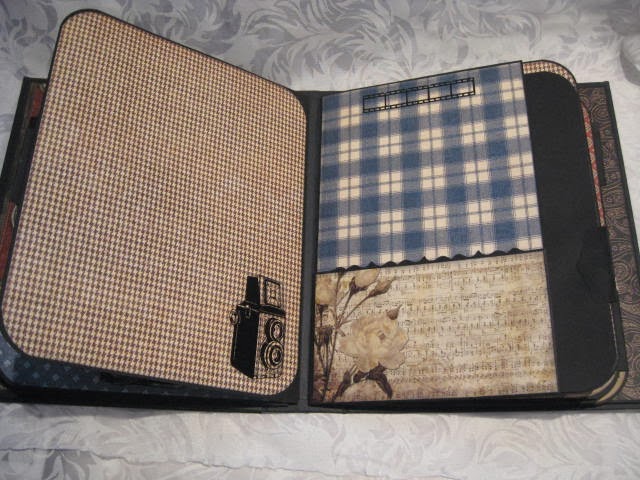
The Build a Page album has lots of flips, folds and flaps!


Whew! That was a lot of photos.  I really enjoyed making these albums and I totally recommend checking out Kathy Orta and her well written tutorials.

Challenges:


Have a great day!
NancyD


Wednesday, February 12, 2014

Kick Back and Relax!

I have made one last Valentine's card and this one has a unique twist.  The envelope is a special creation of intertwined paper to make a heart with a pocket just big enough for my 4" x 4" card.


I found the tutorial on making the heart here on Cherryl Moote's website.  It is a bit tricky but I love the finished project.  I made mine with one solid and one printed paper.


The front of the card has a very cute donkey from the Donkeying Around set from Digital Delights.  I know, I know, your thinking what does a donkey have to do with Valentines?

Well, he is saying - Kick Back and Relax! Your going out to dinner!


Card Recipe
Paper:  Bazzill, Kaiser Craft Chanteuse Collection
Markers/Ink: Copics, Distress Vintage Photo
Embellishments: Sizzix label punch, Darice gems, Fun Bling from Antologia Amor


Challenges for this card:
Be sure and take a look at what the wonderful Design Team has come up with for your inspiration. And then hop over to the Delightful Challenges site and check out this week's challenge.

Have a Great Day!


NancyD

Wednesday, February 5, 2014

Football Scottie is and All Star!

The Seattle Seahawks just won the 2014 Super Bowl so I thought I would color this new Digital Delights image with their colors (or close to it).


Wendy over at Digital Delights just released a great new set of images for you to create with.  I used Footballer Scottie and the new Sports Sentiment Set for this boyish card.


Card Recipe
Paper:  Bazzill Navy, BoBunny Key Lime collection
Markers/Ink: Copics, Distress Blue Jean
Embellishments: Sizzix label punch, Michael's buttons


Challenges for this card:
Be sure and take a look at what the wonderful Design Team has come up with for your inspiration. And then hop over to the Delightful Challenges site and check out this week's challenge.

Have a Great Day!


NancyD

Monday, February 3, 2014

A Proper Gentlemen Album

I have another scrapbook for your inspiration today.  This one was a commission for my hubby's brother.  His 65th birthday is coming up in two weeks and since we cannot attend the party I thought it would be a good idea to send a scrapbook for all the great pictures and stories.

The front cover is designed to look like an Ipad. I used Paper Accents chalkboard vinyl for the center so that we can write notes on the cover.  After I took the picture I added an Apple symbol.


For the body of the book I used Kathy Orta's All Occasions Mini as my inspiration for the construction.  The scrapbook is 8 1/2 by 10 1/2 with pages that are 8x10.


Inside front and page 1 - two generous pockets.


Page 2-3 - two page tag insert.

Page 4-5
Page 6-7.
Page 8-9 - two page tag insert.
Page 10-11.

My niece is planning to add photos of my brother-in-law, and poems and stories from the party.  I am including a bunch of 5x8 tags as well.
Inside back cover.

Recipe

Tutorial: Kathy Orta, All Occasions Mini
Paper:  Graphic 45 A Proper Gentlemen Collection, Bazzill Black, and a few sheets from DCWV Timeless Type
Markers/Ink: Distress Momento Black
Embellishments: Michael's Chain, Clock from BoBunny, Camera acetate from May Road, Michael's Chalkboard Labels, craft ribbon, Tim Holtz On the edge dies, corner rounder, Sizzix label punch


I'll enter the album into the following challenges:
Have a great day!
NancyD

Sunday, February 2, 2014

Craft a scene Technique Challenge

The February theme for Craft a Scene is to use your favorite technique.  Well, I like so many techniques that I decided to try one that was new to me.  

My fellow DT Pia likes to stamp on photographs and she does a beautiful job.  I picked out a selection of photo prints while at the Savanna scenic stamping retreat a couple years ago, but I never had a chance to use them.  So today is the day!

My photograph is sky, a bit of mountain range and water.  The nice thing about this photo is that it is very neutral and can be used for almost anything that is winterish.  I am ignoring the fact that the photo is of water and choosing to pretend that it is snowy instead.


First I stamped the farm scene (came with the barn and a few cows), then I added the fence and horses.  The scene still seemed a little bare so I added the trees, birds and branches. I only added a little bit of color to the barn, cows and grass.  It is winter after all!

Card Recipe

Images: Photograph, Stampscapes stamps and one Sutter stamp
Paper:  Bazzill brown and black
Markers/Ink: Copics, Momento black

Challenge for this card:
Be sure and take a look at what the wonderful Craft a Scene design team has come up with for your inspiration. 
Have a Great Sunday!


NancyD