

I think that blog had a cutting layout, but since I can't remember where it is I needed to come up with my own pattern. I wanted to use the tools available to me and I was not about to cut out the pieces by hand (bad idea!). So, I used my Cuttlebug and Spellbinder circles to do the work for me.
I have both the small and large circles, which came in handy. I used the 3 1/4, 3, 2 3/4, 1, and 3/4 inch circles to cut the base and two layers of designer paper.

After cutting the two base circles I needed to find the center of each and cut out 1/4 of the circle.

The carriage backing is cut from the same card stock at 2 1/4 by 7 3/4 and scored at 1/4 inch on both of the long sides. To make it fit better around the circle you will need to cut out little triangles along both edges near the score lines as shown.
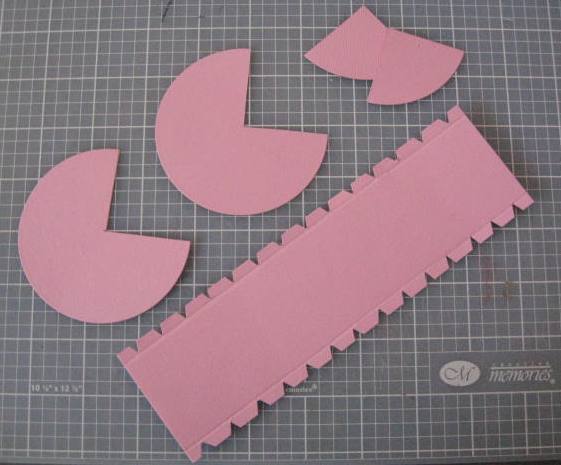 |
| Carriage Base Pieces |


Next, I layered all the pieces and began the construction process. I quickly found that the backing strip needed to be made with really strong adhesive, so be sure to use something like Scoretape instead of a glue runner. I placed the Scoretape on the circle instead of the backing strip.
Working with one side at a time, gently ease the strip around the edges of the circle and press firmly to make it stick. Make sure that your two edges line up for a clean seam.
After I had the base put together I attached the wheels with brads, then added my embellishments of pearls, lace and a ribbon.
 We are going to slip a gift card for baby supplies into the carriage and deliver it this weekend.
Have a go at your own version and let me know how it turns out.
Happy Stamping!


